Magnatag InSight
The whiteboard and how it helps us brainstorm, innovate, motivate and create
RECENT BLOG POSTS
CATEGORIES
Guides
7 Steps to Create a Visual Workflow Board for Teams
Thu Aug 13 2026Last updated June 2026
Originally published October 23, 2025. Refreshed with expanded lean manufacturing visual management methods for factory, operations, and continuous improvement teams.
Visual workflow boards transform chaotic team processes into clear, actionable systems that drive productivity, accountability, and collaboration. Whether you're managing software development sprints, marketing campaigns, production schedules, maintenance work orders, quality escapes, or daily factory performance, a well-designed visual workflow board serves as the central nervous system for your team's work.
In lean manufacturing, visual management is more than "putting work on a board." A good visual system makes the difference between normal and abnormal obvious at a glance, shows who owns the next action, and triggers the right response without waiting for another meeting, report, or email thread. The board should help the team see:
What should be happening
What is actually happening
Where work is blocked
Who owns the countermeasure
When the next action is due
Whether yesterday's problem is still open today
We've spent the last sixty years working with teams of all shapes and sizes to help visualize their work; from developing project management systems for small businesses, to designing better ways to track production, sales, service, safety, and staffing workflows. We've come to learn there's no process that can't be visualized. Using our expert guidance, this expanded practitioner guide walks you through seven proven steps to create an effective visual workflow board that aligns your team around shared goals, measurable outcomes, and lean daily management.
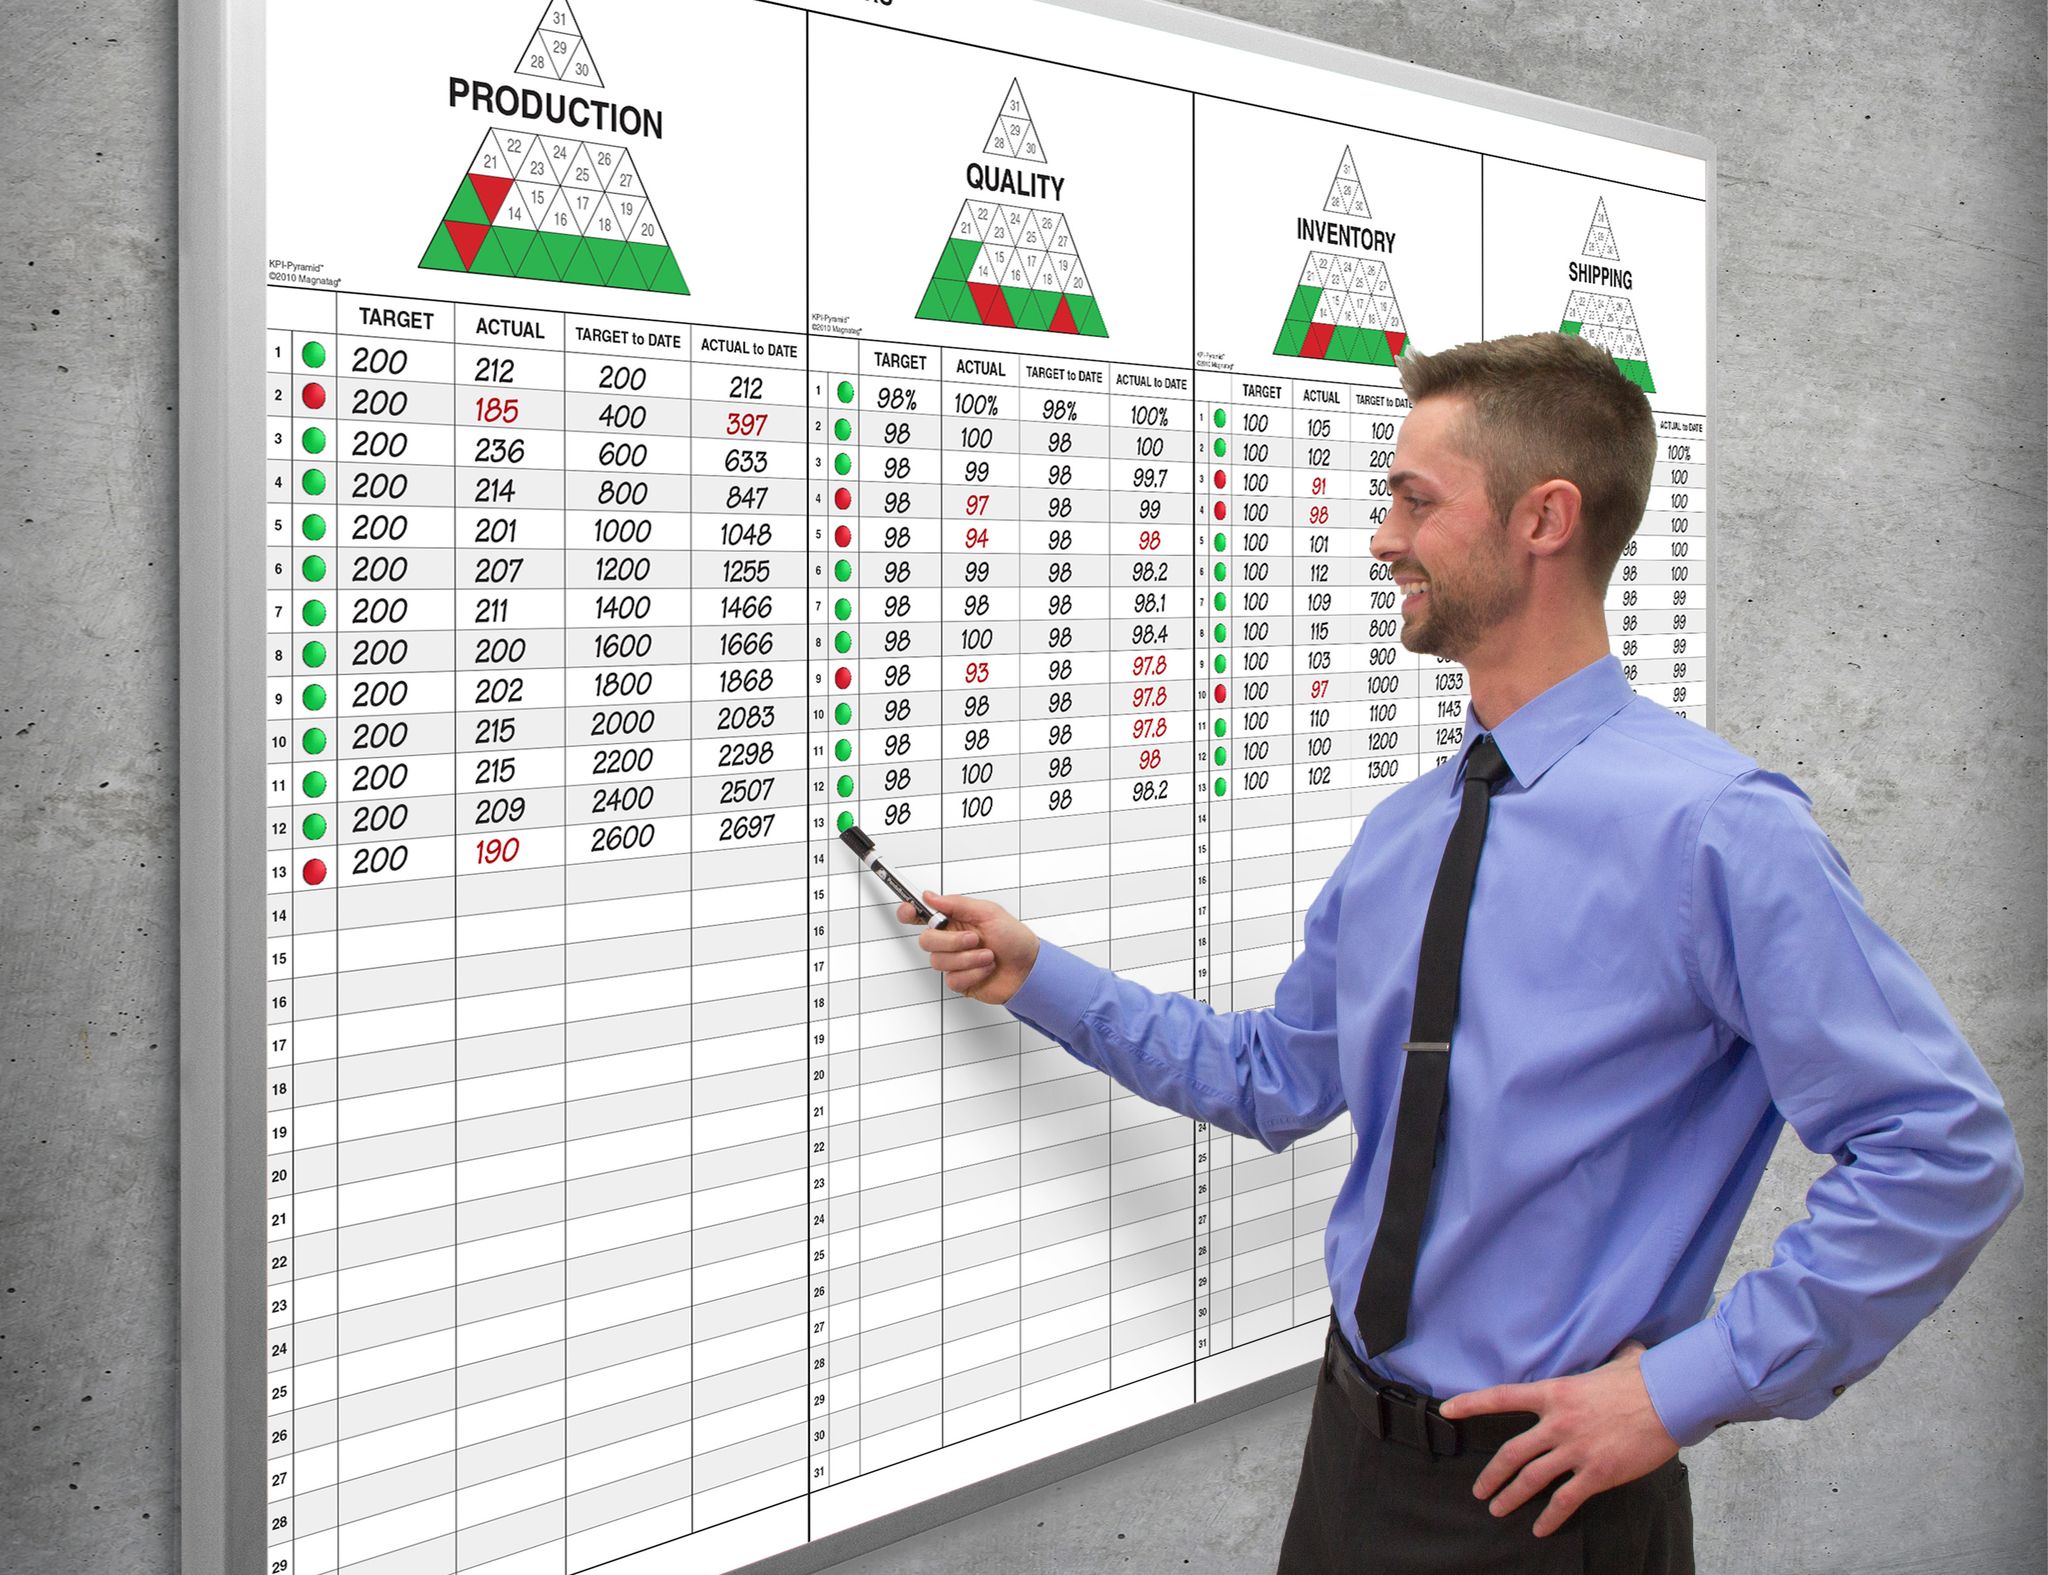
What Makes a Visual Workflow Board "Lean"?
A workflow board becomes a lean visual management tool when it does more than display status. It should help the team expose waste, shorten feedback loops, and improve the process. In practical terms, that means the board should support at least one of these lean purposes:
The strongest visual workflow boards are simple enough for a new team member to understand quickly, but structured enough to drive disciplined daily action.
Step 1: Identify Your Team's Workflow Goals
Before diving into board design, successful workflow visualization begins with defining crystal-clear objectives. The ultimate question you need to ask yourself is, "What am I looking to accomplish?" Teams that establish specific goals for their workflow boards create a foundation for measurable success and sustained adoption across their organization. After all, if you know what you're tracking, you know what needs to be included.
Start by defining what efficiency looks like for your specific team context. For a software development team, this might mean reducing the time between code commits and deployment. For marketing teams, efficiency could translate to faster campaign approvals or clearer content review processes. Customer service teams might focus on reducing response times or improving case resolution rates. In a factory, it might mean improving schedule adherence, reducing changeover delays, exposing quality defects earlier, or keeping 5S audit actions from disappearing after the audit.
Once you've settled on what you're measuring against, document your target outcomes in concrete terms. Rather than vague aspirations like "better communication," specify measurable goals such as "reduce project handoff time," "make all overdue work visible during the daily huddle," or "ensure every red KPI has an assigned countermeasure before the meeting ends." These specific targets become the benchmarks against which you'll evaluate your workflow board's effectiveness.
The business case for workflow visualization is compelling. Research shows that data-driven firms make decisions faster when they visualize their processes effectively. This acceleration occurs because visual workflows turn complex processes into actionable visuals that improve clarity and efficiency across all team members.
Consider creating a simple goals matrix that maps each objective to specific metrics. For example, if your goal is improved task ownership, your metric might be "zero tasks without assigned owners for more than 24 hours." This approach ensures your workflow board serves strategic purposes rather than becoming just another organizational tool.
Lean methodology in practice: stand up a 5S audit board
A 5S audit board is one of the most practical starting points for lean visual management because it connects standards, accountability, and workplace discipline in one visible place. The board should not exist only to post a score. It should make the current condition of the area visible and drive action when the standard is not met.
A strong 5S audit board includes sections for:
Area or zone map
Show the physical area being audited: cell, line, department, warehouse zone, tool crib, maintenance shop, or office space. If the workplace is divided into zones, assign ownership by zone so there is no confusion.5S audit checklist
Organize the checklist around the five 5S categories:Sort: Are unnecessary tools, materials, documents, obsolete parts, and clutter removed?
Set in Order: Are needed items located, labeled, easy to access, and returned to the correct place?
Shine: Is the area clean, inspectable, and free of leaks, dust, debris, or hidden abnormalities?
Standardize: Are visual standards, labels, photos, cleaning routines, and audit criteria clear?
Sustain: Are audits completed on schedule, actions closed, and standards maintained over time?
Audit schedule and owner
Display who performs the audit and when. Many teams use a mix of operator self-checks, supervisor checks, and cross-area audits to keep the system honest.Score or status trend
Use a simple visual trend so the team can see whether the area is improving, holding, or sliding backward. Do not let the score become the only focus. A high score with recurring open actions is not a healthy 5S system.Before and after photos
Photos are powerful visual standards. "What good looks like" should be obvious. Use before/after images when correcting a condition, and use standard-condition photos for recurring checks.Red-tag or abnormality parking lot
Create a section for items that need disposition: unknown parts, excess inventory, broken tools, obsolete fixtures, expired materials, or unneeded documents. Each item should have an owner and decision date.Countermeasure/action register
Every audit gap should become an action item with:Problem or finding
Area or location
Owner
Due date
Current status
Verification of closure
A simple 5S audit board layout can look like this:
The key is to make 5S a living management system. If the board only records audit scores, it becomes wallpaper. If it exposes gaps, assigns owners, and verifies follow-through, it becomes a lean visual control.
Step 2: Break Down the Workflow into Manageable Tasks
Complex workflows become manageable when decomposed into distinct, actionable steps. This breakdown prevents the confusion and miscommunication that often plague teams working with poorly defined processes. In fact, we find the process so effective that we've developed a project management board specifically designed for step-by-step breakdowns.
Begin by mapping your entire workflow from start to finish. Gather your team for a collaborative session where you trace each step of your current process, regardless of how informal or inconsistent it might be. Document every handoff, decision point, and deliverable, even those that seem obvious or automatic. After a few conversations, you should have a strong feel for where these breakout steps belong in your overall project timeline.
Transform this comprehensive map into discrete, manageable actions. Each task should be specific enough that team members understand exactly what needs to be accomplished and when it's considered complete. Instead of "review content," specify "review blog post for grammar, brand voice, and SEO optimization." Instead of "run job," specify "complete setup, verify first-piece approval, run production, record downtime, and move completed quantity to inspection." These milestones become checkpoints throughout your project timeline.
Research confirms that breaking down complex tasks reduces confusion and miscommunication significantly. This improvement occurs because smaller, well-defined tasks eliminate ambiguity about expectations and deliverables.
Create a structured task inventory using a simple table format:
This systematic approach to task breakdown becomes the foundation for your visual workflow board's structure and ensures nothing falls through the cracks during implementation.
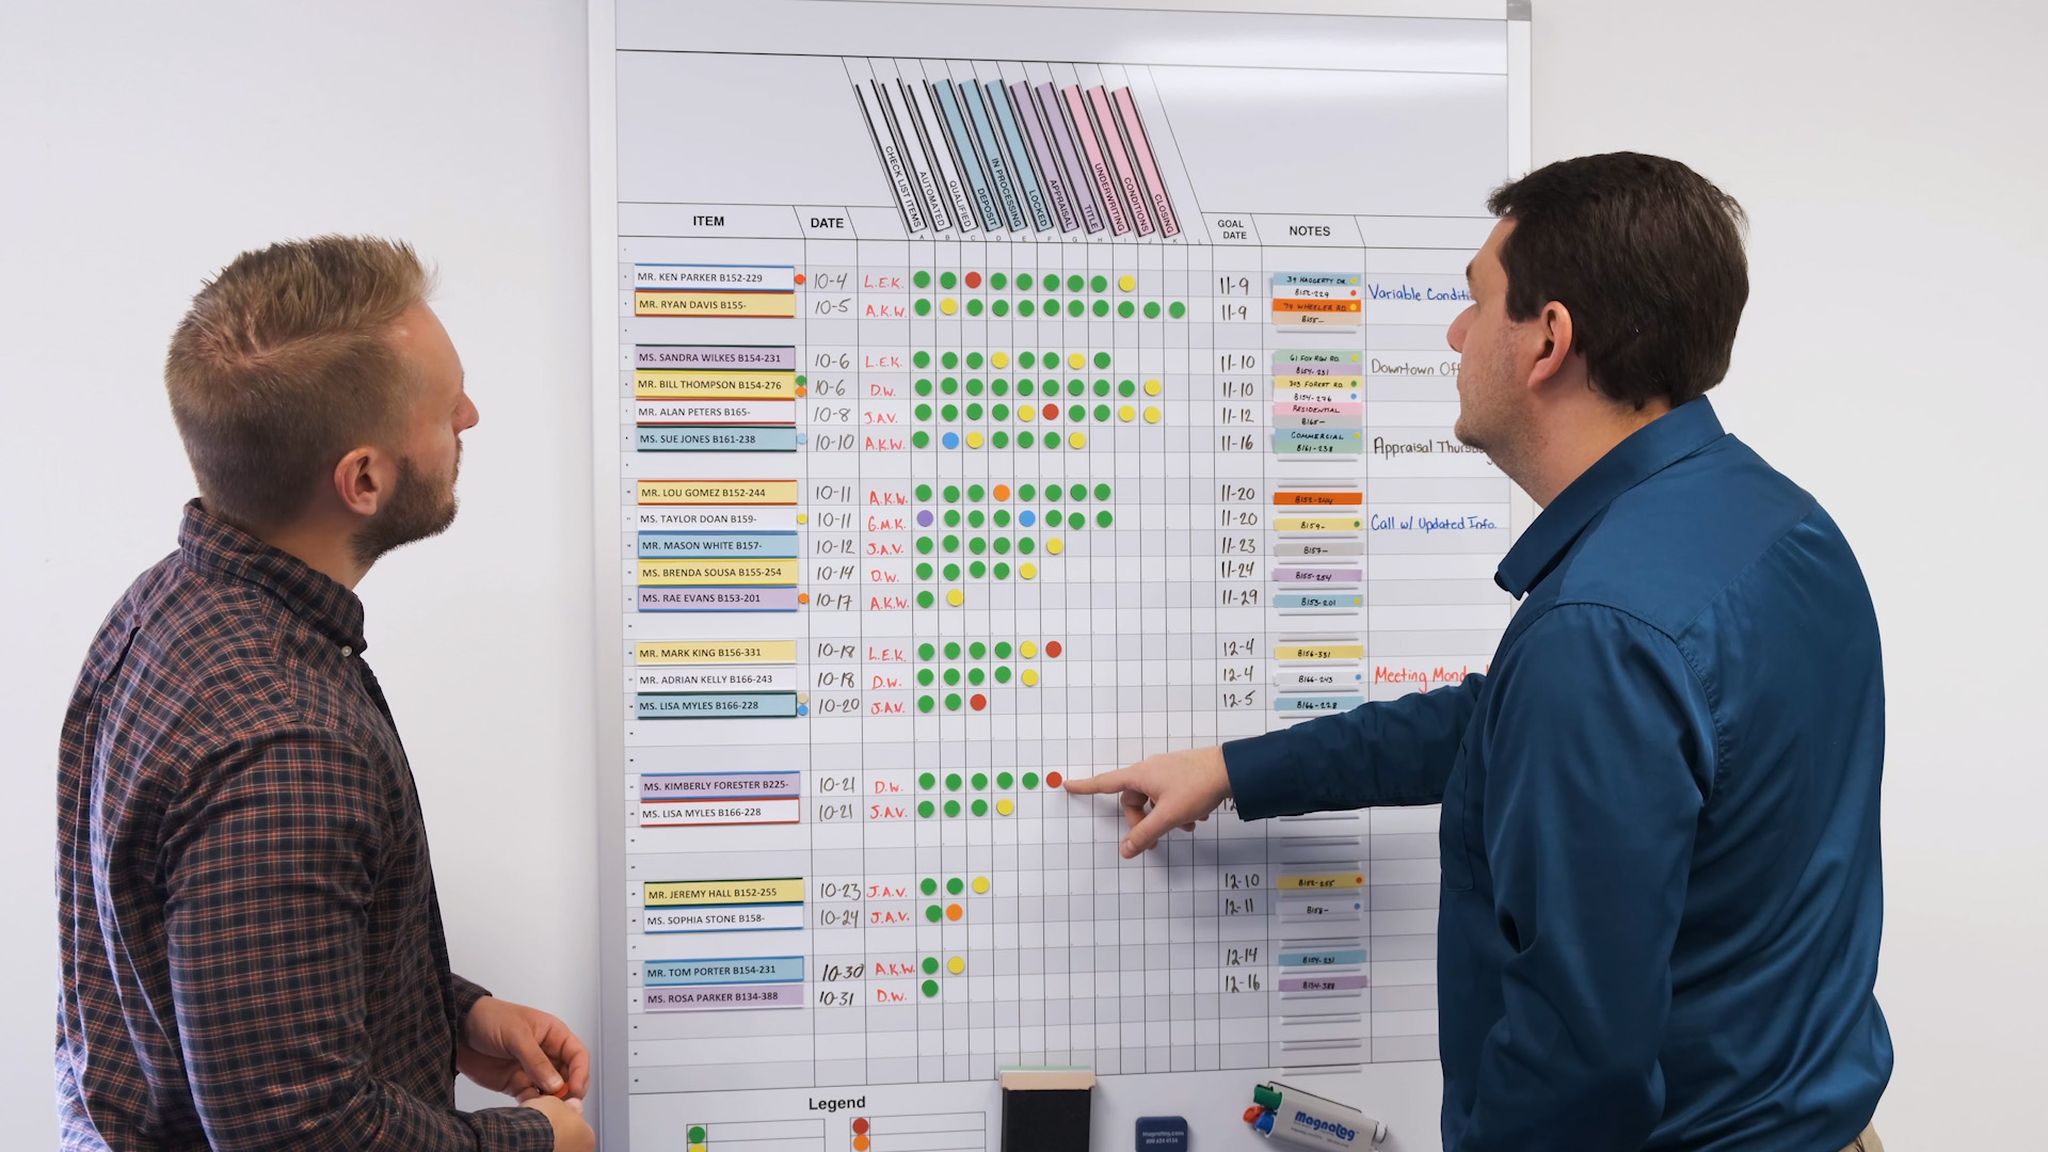
Step 3: Assign Clear Roles and Responsibilities
Accountability thrives when every team member understands their specific responsibilities within the workflow. Clear role assignment eliminates the ambiguity that leads to missed deadlines, duplicated efforts, and finger-pointing when problems arise.
Document exactly who owns each task or workflow stage. This can be done via a digital assignment tracking tool or right on the project management system itself. Wherever you choose to list assignments, you need to make sure assignees are aware of the ownership. Assignments need to be highly visible and eliminate any confusion. Avoid shared ownership without clear primary responsibility, as this often results in tasks falling through the cracks. Instead, designate a single point person for each major workflow component while identifying supporting team members who contribute to the process.
Effective role clarity requires outlining both responsibilities and deliverables. Specify not just who does what but what constitutes successful completion of each responsibility. This clarity reduces potential overlaps and missed steps that can derail even well-intentioned team efforts.
Consider implementing a responsibility matrix that maps tasks to team members:
This structured approach to role assignment creates transparency around expectations and provides clear escalation paths when issues arise. Team members can quickly identify who to contact for questions, approvals, or problem resolution.
Regular role clarification sessions help maintain accountability as teams evolve and workflows change. Schedule quarterly reviews to ensure role assignments remain current and effective for your team's changing needs.
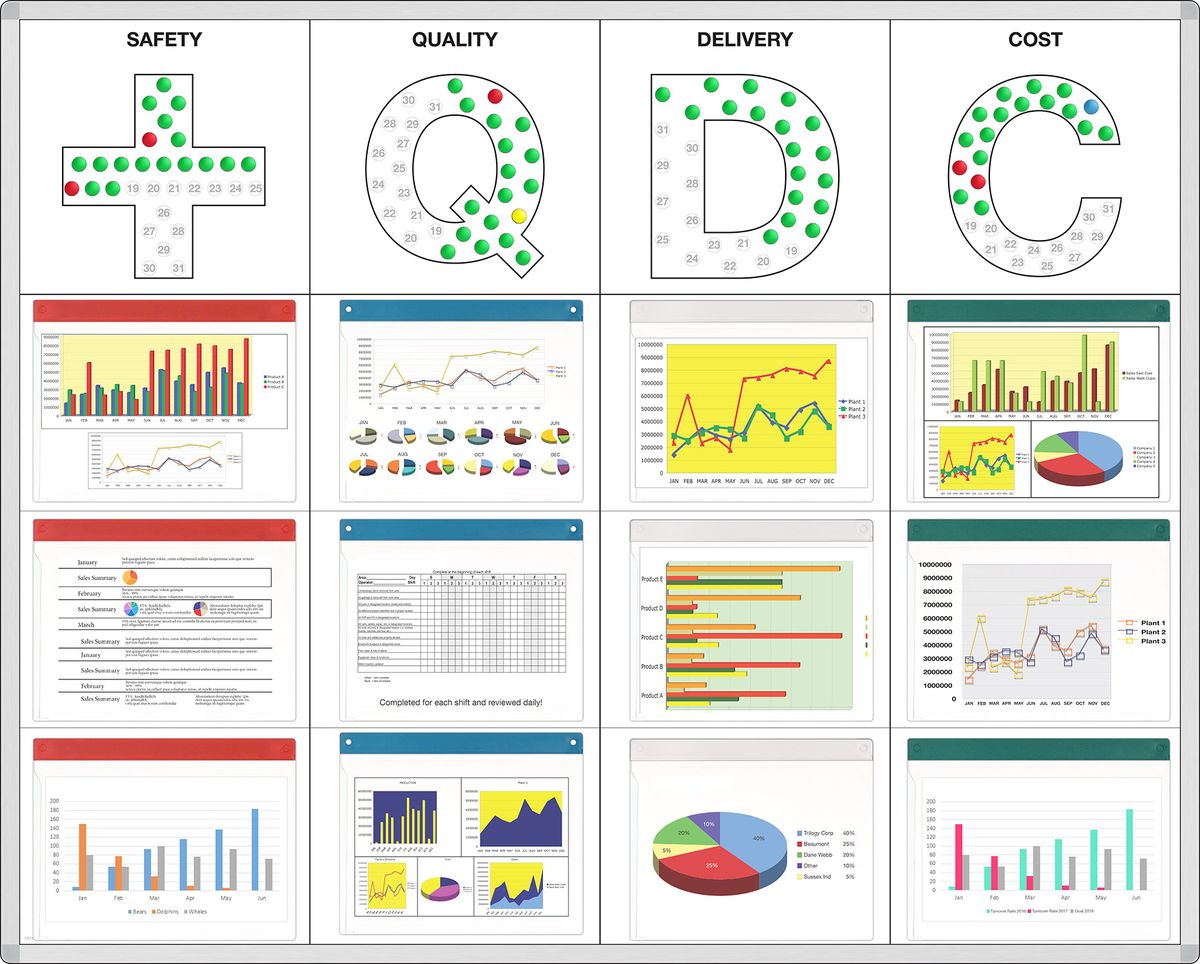
Lean methodology in practice: run an SQCDP daily management cadence
In manufacturing and operations environments, one of the most effective ways to turn role clarity into daily accountability is an SQCDP board. SQCDP stands for:
Safety
Quality
Cost
Delivery
People
SQDC boards are typically used in a daily tier or standup meeting rhythm. The purpose is not to give long updates. The purpose is to compare actual performance to target, identify abnormalities, assign countermeasures, and escalate problems that cannot be solved at the current level.
A practical SQCDP board should answer five questions every day:
A typical tiered cadence may look like this:
The rhythm matters. If the board is only updated before a weekly meeting, the team loses the daily management benefit. A useful SQCDP routine includes:
Update before the huddle
Owners update yesterday's actuals, red/green status, blockers, and open actions before the meeting starts.Start with Safety
Safety should not be buried at the end of the meeting. Discuss unsafe conditions, near misses, and open safety countermeasures first.Review red conditions first
Green items should move quickly. The team's attention should go to abnormalities and decisions.Assign one owner per action
Every red SQCDP item needs a clear owner, due date, and next step. "Team to review" is not ownership.Escalate unresolved issues
If a problem cannot be solved at Tier 1, it should move visibly to the next tier with context, not disappear into a side conversation.Close the loop
Completed actions should be verified, not simply erased. If the same problem returns, it may require root cause analysis instead of another quick fix.
An SQCDP board creates a practical daily management cadence because it forces the organization to look at performance through a balanced lens. Delivery cannot improve at the expense of safety. Cost cannot improve by hiding quality problems. People gaps cannot be ignored until they become schedule misses.
Step 4: Choose the Right Visual Board and Document Your Workflow
Selecting the appropriate visual format for your workflow board determines how effectively your team can interpret and act on the information presented. Different visualization approaches serve different workflow types and team preferences.
A Kanban board uses columns and cards to represent task stages and progress, making it ideal for continuous workflows where tasks move through predictable stages. Software development teams often favor Kanban boards for tracking features from backlog through deployment, while marketing teams use them to manage content from ideation through publication. In manufacturing, Kanban boards can also support replenishment, production authorization, maintenance requests, tooling queues, and internal service workflows.
Flowcharts employ shapes and arrows to represent process steps and decision points, excelling at mapping workflows with multiple decision branches or complex approval processes. These diagrams work particularly well for documenting procedures that involve conditional logic or multiple possible outcomes.
Swimlane diagrams divide workflows into parallel lanes for different roles or departments, providing exceptional clarity for cross-functional processes. When workflows involve multiple departments or external stakeholders, swimlane diagrams prevent confusion about who handles each step.
The key to choosing the right format lies in matching your workflow's characteristics to each visualization method's strengths. Simple, linear processes work well with basic Kanban boards, while complex, multi-departmental workflows benefit from swimlane diagrams.
Document your chosen workflow visually using your selected format. This central, visual reference streamlines teamwork and avoids miscommunications by providing a single source of truth for process expectations. Include all task dependencies, decision points, and handoff requirements in your documentation.
Create a legend or key that explains your visual conventions. Define what different colors, shapes, or symbols mean within your workflow board context. This standardization ensures new team members can quickly understand and contribute to the workflow process.
Lean methodology in practice: match the board type to the management problem
Lean visual management works best when the board format fits the problem you are trying to control. Do not start with the board template. Start with the management need.
A few practical design rules apply to almost every lean board:
Make abnormal conditions visual. Red, yellow, blocked, overdue, or "help needed" indicators should stand out.
Put decisions near the work. Boards used by frontline teams should be located where the work is discussed, not hidden in a conference room.
Use physical space deliberately. If a section is important, give it enough room. Tiny action registers discourage use.
Limit clutter. A board that tries to show everything usually helps with nothing.
Show ownership. Names, initials, owner magnets, or lanes should make accountability obvious.
Show timing. Due dates, aging, review dates, and shift/day markers prevent stale information.
Include a board standard. Add a small "how to use this board" legend or standard work note.
Step 5: Communicate the Workflow Board to Your Team
Successful workflow board implementation depends on clear communication and team buy-in. Even the most thoughtfully designed board fails if team members don't understand how to use it effectively or why it benefits their daily work.
Present your workflow board in a dedicated team meeting where you can explain each element and answer questions in real time. Walk through several example scenarios that demonstrate how different types of tasks or projects would flow through the board. This hands-on explanation helps team members visualize how the board applies to their specific responsibilities.
Develop a communication plan that includes regular check-ins and feedback sessions during the initial implementation period. Schedule weekly touchpoints for the first month to address questions, confusion, or suggested improvements. This proactive communication approach prevents small issues from becoming major adoption barriers.
Effective communication about workflow processes prevents misinterpretation and encourages goal-driven collaboration across all team members. When everyone understands not just how to use the board, but why it exists and how it supports team goals, adoption rates increase significantly.
Create quick reference materials that team members can consult independently. A simple one-page guide explaining board conventions, common workflows, and troubleshooting steps empowers team members to use the board confidently without constant supervision.
Consider appointing workflow champions within your team who can provide peer support during the transition period. These champions help answer questions and reinforce proper board usage through informal coaching and encouragement.
Step 6: Schedule Regular Reviews to Monitor Progress
Periodic workflow reviews transform your visual board from a static tool into a dynamic system that continuously improves team performance. These structured evaluations help identify bottlenecks, celebrate successes, and adapt processes to changing business needs.
Establish recurring check-ins at intervals that match your workflow's natural rhythm. Weekly reviews work well for fast-moving projects with short task cycles, while monthly reviews suit longer-term initiatives or strategic planning workflows. In production environments, some boards require shiftly, daily, or even hourly review. The key is consistency rather than frequency.
Use concrete data points to drive your review discussions. Track metrics like task completion times, bottleneck frequency, missed deadlines, aging work, blocked work, rework, first-pass quality, schedule misses, and team satisfaction scores. These objective measures provide clear indicators of workflow effectiveness and highlight areas needing attention.
Uncovering bottlenecks with workflow visualization supports faster, smarter adjustments to team processes. Visual boards make performance patterns obvious, allowing teams to spot recurring problems and implement targeted solutions.
Create a simple review checklist that guides each session:
Which tasks consistently take longer than expected?
Where do tasks get stuck most frequently?
Are team members clear about their responsibilities?
What feedback has the team provided about the current process?
Which workflow elements are working particularly well?
Which overdue items need escalation?
Which red metrics do not yet have countermeasures?
Which closed actions need verification?
Which board sections are not being updated or used?
Document review findings and the resulting process adjustments. This historical record helps teams understand how their workflows evolve over time and provides valuable context for future improvements.
Lean methodology in practice: review target vs. actual and respond with PDCA
In lean daily management, the review is not just "What happened?" It is:
What was the target?
What was the actual condition?
What is the gap?
What caused the gap?
What countermeasure are we testing?
Who owns it and by when?
How will we check whether it worked?
This is the Plan-Do-Check-Act cycle applied at the board.
A practical review standard can look like this:
For production boards, use reason codes or simple categories to understand recurring gaps. For example, if delivery misses occur repeatedly, categorize the reasons: material shortage, changeover delay, equipment downtime, quality hold, staffing gap, engineering change, or schedule conflict. Once reasons are visible, the team can use Pareto thinking to focus on the biggest drivers instead of treating every miss as a one-off incident.
A strong review routine has three levels:
Daily or shift review
Focus on immediate abnormalities, safety issues, blocked work, and actions due now.Weekly trend review
Look for patterns: recurring bottlenecks, repeat defects, chronic late handoffs, or aging work.Monthly improvement review
Decide whether the workflow, staffing, standard work, training, or board design needs to change.
If the board does not change behavior during the review, it is not yet functioning as visual management. A board review should end with decisions, not just discussion.
Step 7: Refine and Improve Your Workflow Continuously
Workflow optimization is an ongoing process that requires regular refinement based on real-world experience and changing business requirements. The most effective visual workflow boards evolve continuously to serve their teams' changing needs.
Collect feedback systematically from all workflow participants. Create simple feedback mechanisms like monthly surveys, suggestion boxes, or dedicated discussion sessions where team members can propose improvements. Front-line workers often identify optimization opportunities that managers miss.
Documenting and refining workflows helps teams spot automation opportunities and boost performance significantly. As you refine your processes, look for repetitive tasks that could be automated, redundant steps that could be eliminated, or bottlenecks that could be resolved through resource reallocation.
Common refinement examples include reassigning steps to more appropriate team members, combining redundant stages that don't add value, introducing new workflow columns that provide better visibility into task status, or adding blocked-work indicators so problems surface earlier. Each adjustment should address a specific problem or opportunity identified through your regular reviews.
Test workflow changes incrementally rather than implementing major overhauls all at once. Small, focused improvements allow you to measure impact clearly and roll back changes that don't deliver expected benefits. This iterative approach reduces disruption while maintaining momentum toward better processes.
Celebrate workflow improvements with your team. When refinements lead to faster delivery times, reduced errors, improved safety response, fewer missed handoffs, or improved job satisfaction, acknowledge these wins publicly. Recognition reinforces the value of continuous improvement and encourages ongoing participation in optimization efforts.
Visual Workflow Board Design Checklist
Use this checklist before finalizing your board design.
Example Factory Visual Management Board Layouts
Below are practical board layouts you can adapt for lean manufacturing, operations, maintenance, quality, or cross-functional teams.
1. Production Daily Management Board
2. Hour-by-Hour Production Board
3. 5S Audit Board
4. Kaizen Event Board
5. Maintenance / TPM Board
Frequently Asked Questions
What are the key benefits of using a visual workflow board?
Visual workflow boards simplify complex processes by making abstract workflows concrete and actionable. They improve clarity by showing exactly where each task stands in the overall process, highlight bottlenecks before they become major problems, and foster collaboration by providing a shared understanding of team responsibilities.
Teams using visual workflow boards, like those created with Magnatag, make decisions faster because they can quickly assess current status, resource allocation, blocked work, and ownership without lengthy status meetings or email chains. In lean manufacturing environments, the board also helps expose abnormalities, support daily management, and connect problems to countermeasures.
What is visual management in lean manufacturing?
Visual management in lean manufacturing is the practice of making work status, standards, problems, and performance visible so teams can understand the current condition at a glance and take action. The goal is not decoration or reporting. The goal is faster recognition and response.
A lean visual management system often includes production boards, SQCDP boards, 5S audit boards, Kanban systems, Andon signals, hour-by-hour boards, training matrices, maintenance boards, A3 boards, and kaizen tracking boards. The best systems show the gap between target and actual and make ownership of the next step clear.
How do I choose between different types of workflow boards?
Select your workflow board type based on your process complexity, team structure, and management need. Kanban boards excel at managing task flow through predictable stages, making them ideal for development teams, content creation workflows, internal service queues, replenishment systems, or maintenance requests.
Flowcharts work best for mapping decision-heavy processes with multiple possible outcomes, such as customer service escalation procedures or quality containment decisions. Swimlane diagrams provide the clearest view of role-based responsibilities in cross-functional workflows involving multiple departments or external stakeholders.
For factory daily management, consider SQCDP boards, hour-by-hour boards, 5S boards, kaizen boards, and production control boards depending on the problem you need to manage.
What should be included on a production visual management board?
A production visual management board should show the information the team needs to run the day and respond to abnormalities. Common sections include:
Safety status and open safety actions
Quality issues, defects, scrap, or rework
Production plan vs. actual output
Delivery risks or late orders
Equipment downtime or maintenance concerns
Staffing and training needs
Material shortages or constraints
Blocked work or escalations
Countermeasures with owners and due dates
The most important section is usually the action register. If the board shows red metrics but does not track owners and countermeasures, it is reporting performance, not managing performance.
How often should a visual workflow board be updated or reviewed?
Review your workflow board regularly to ensure it reflects current priorities and processes. Weekly reviews work well for fast-paced project teams with short task cycles, while monthly reviews suit longer-term projects or strategic initiatives.
In manufacturing and operations environments, many boards require a faster cadence:
Hour-by-hour boards: updated during the shift
SQCDP boards: reviewed daily
Tier meeting boards: reviewed at each tier cadence
5S audit boards: updated during scheduled audits and action reviews
Kaizen boards: updated daily during events and weekly during follow-up
Project boards: updated at least weekly, or whenever status changes
The key is establishing a consistent rhythm that catches emerging bottlenecks early while avoiding review fatigue. Update the board immediately when processes change, but evaluate the board's overall effectiveness during scheduled review sessions.
What is an SQCDP board?
An SQCDP board is a lean daily management board organized around Safety, Quality, Cost, Delivery, and People. It helps teams review performance in a balanced way so one priority does not hide another. For example, a team should not celebrate delivery success if quality issues, safety risks, or staffing problems are being ignored.
An SQCDP board is usually reviewed during a short daily huddle. Each red or abnormal condition should have a countermeasure, owner, and due date. Issues that cannot be solved at the frontline level should be escalated through the tier management process.
How is a 5S audit board different from a general workflow board?
A general workflow board tracks work moving through a process. A 5S audit board tracks workplace organization and sustainment against defined standards. It typically includes the five 5S categories: Sort, Set in Order, Shine, Standardize, and Sustain.
A strong 5S audit board should include audit criteria, schedule, area ownership, score or status trend, red-tag items, before/after photos, and an action register. The action register is what turns a 5S board from a scoring tool into an improvement tool.
How do kaizen event tracking boards support continuous improvement?
Kaizen event tracking boards make improvement work visible. They help teams track the event charter, current state, waste observed, improvement ideas, future state, action items, owners, due dates, before/after results, and sustainment checks.
The board prevents a common kaizen failure: generating good ideas during the event but losing follow-through afterward. By keeping actions visible until closure, the team can verify whether improvements were implemented and sustained.
What common challenges arise when implementing a workflow board?
Teams frequently encounter resistance to new tools, especially from members comfortable with existing processes. Combat this by clearly communicating benefits and providing adequate training. Unclear role definitions create confusion about who updates the board and when, so establish specific responsibilities for board maintenance.
Inconsistent updates render boards useless, making it essential to integrate board updates into daily routines rather than treating them as optional activities. Other common issues include:
Too many metrics and not enough action
Board located away from the work
Red items without owners
Old information left on the board
Leadership using the board for blame instead of problem solving
No standard for colors, symbols, or status definitions
Digital and physical systems that contradict each other
Board reviews that become long meetings instead of focused decisions
How can visual workflow boards improve team collaboration and accountability?
Visual workflow boards increase transparency by making task ownership and status visible to all team members. This visibility eliminates the need for constant status check-ins and reduces the risk of tasks falling through the cracks. Team members can quickly identify dependencies, offer assistance when colleagues are overloaded, and coordinate their efforts more effectively.
The public nature of visual boards also creates natural accountability, as everyone can see who owns which tasks and how quickly work progresses through the system. In a lean environment, this accountability should be process-focused rather than blame-focused. The board should help the team ask, "What in the process allowed this gap to happen, and what countermeasure are we testing?"
What is the difference between a Kanban board and a visual management board?
A Kanban board is one type of visual management board. It is designed to manage flow, limit work in process, and show work moving through defined stages. A visual management board is a broader category that can include Kanban boards, SQCDP boards, 5S audit boards, hour-by-hour boards, kaizen boards, A3 boards, and other visual controls.
Use a Kanban board when the main problem is managing work-in-process and flow. Use other visual management formats when the main problem is daily performance, safety, quality, 5S sustainment, improvement tracking, or escalation.
Should a visual workflow board be physical, digital, or both?
The right format depends on where the work happens and how the team manages it. Physical boards are especially effective in factories, warehouses, labs, maintenance shops, and team areas where people gather around the work. They are visible, immediate, and easy to update during a standup.
Digital boards are useful for remote teams, multi-site workflows, and processes that require system integration or historical reporting. Many organizations use both: a physical board for daily management at the point of work and a digital system for recordkeeping, reporting, or cross-site visibility.
The key is to avoid duplicate systems that disagree. If you use both, define which system is the source of truth for each type of information.
Final Takeaway
A visual workflow board is effective when it changes the way the team manages work. It should make priorities visible, expose problems early, clarify ownership, and create a reliable cadence for action. In lean manufacturing, the board should also reinforce standard work, daily management, 5S discipline, problem solving, and continuous improvement.
Start with the workflow goal. Break the work into visible steps. Assign clear ownership. Choose the right board format. Communicate the system. Review it consistently. Improve it continuously.
When those seven steps are followed, the board becomes more than a place to write updates. It becomes a practical management system the team can use every day.
Full‑Wall Whiteboard Panels vs Paint: Performance, Cost, and Longevity Compared
Wed Dec 3 2025Choosing between full-wall whiteboard panels and whiteboard paint involves more than aesthetics—it's a decision that affects workspace functionality, maintenance budgets, and long-term satisfaction. Full-wall whiteboard panels, particularly porcelain-on-steel systems, deliver superior durability and magnetic capability but require higher upfront investment. Whiteboard paint offers design flexibility and lower initial costs but often sacrifices performance and longevity. This comparison examines both solutions across performance, cost, installation, and maintenance to help facility managers, educators, and office designers make informed decisions that align with their operational needs and budget constraints.
Performance Comparison
The functional gap between full-wall whiteboard panels and whiteboard paint becomes apparent in daily use. Panels, especially those built with porcelain-on-steel construction, deliver consistent performance across decades, while paint-based surfaces often degrade within months of regular use.
Durability and Writing Quality
Porcelain-on-steel panels consist of a glass-ceramic surface permanently fused to steel at temperatures exceeding 1,500°F, creating a nonporous, scratch-resistant writing surface. This robust construction process helps the surface resists stains, dents, and surface degradation even under intensive daily use. Long-term performance testing consistently proves porcelain enamel-based whiteboards maintain their writing quality for decades, whereas painted dry-erase surfaces commonly develop ghosting and wear within the first couple of years. The question is not whether porcelain is a more robust writing surface than it’s painted contemporary, but rather why painted dry-erase surfaces fail to live up to the durability standards of the industry’s most robust surfaces. And to that end, we need look no further than the material itself.
Whiteboard paint creates a polymer coating over existing wall surfaces, typically requiring multiple coats to achieve a writable finish. The porous nature of painted surfaces makes them vulnerable to ink absorption—a phenomenon called ghosting, where marker pigments penetrate the coating and become permanent stains. Most whiteboard paint manufacturers acknowledge this limitation, recommending surface reapplication every 2–3 years in high-traffic environments. Dry-erase paints are, in essence, an epoxy coating. If you’ve ever worked with epoxy, you understand just how difficult it is to remove. Epoxy is designed to be extremely durable and chemically resistant, bonding tenaciously to substrates like drywall, plaster, or wood—which is why epoxy floors are so popular in garages; it’s nearly impossible to scrape away by hand. Once cured, it forms a cross-linked polymer network that shrugs off solvents, abrasives, and even mechanical scraping. Removing it typically demands aggressive methods: industrial heat guns to soften the resin, followed by meticulous chiseling or sanding with 60-grit paper on an orbital sander, all while generating clouds of toxic dust that require full PPE and HEPA filtration. Even then, you’re left with a gouged wall that needs skim coating and repainting.
Although epoxy coatings are structurally durable and bond intensely to walls, their writing performance is limited. The cured surface still contains micro-textures that readily absorb ink pigments, which is why ghosting remains a persistent issue despite the coating’s physical toughness.
Magnetic Capability
Magnetic functionality represents one of the clearest differentiators. Steel-backed whiteboard panels inherently support magnets across their entire surface, enabling users to post documents, affix organizational tools, and layer visual information without adhesives. Magnatag's WhiteWalls systems integrate this magnetic capability with custom-printed templates, allowing organizations to create structured visual management boards that combine writing space with fixed informational layouts.
Whiteboard paint applied to non-magnetic substrates like drywall or wood does not provide any magnetic function. Some manufacturers offer magnetic primer as a separate product, but this adds cost, installation complexity, and often delivers weak magnetic hold—typically insufficient for anything heavier than a single sheet of paper. The magnetic primer itself can create a gritty texture that interferes with smooth writing and erasing.
Size and Coverage Flexibility
Paint offers unmatched flexibility for irregular spaces, curved walls, and custom shapes. A single gallon typically covers 50–70 square feet, making it straightforward to coat entire rooms, columns, or architectural features without seams. This makes whiteboard paint attractive for creative applications where visual continuity matters more than performance longevity.
Panel systems require planning around standard wall dimensions, as panels remain flat after install. Most full-wall panel systems are multi-panel designs, incorporating a series of connected panels across the entire wall. Magnatag's concealed mounting hardware and precision-cut panels create nearly seamless installations when properly aligned, but total seam visibility will vary on a manufacturer by manufacturer basis. For spaces requiring extensive coverage, panels deliver uniform, flat, performance across the entire surface, whereas paint often shows application inconsistencies and varying thickness that affect writing quality.
Cost Analysis
Initial pricing tells only part of the cost story. A comprehensive financial comparison must account for installation labor, maintenance expenses, replacement frequency, and the productivity impact of surface degradation over time.
Upfront Investment
Whiteboard paint costs $40–$80 per gallon for quality formulations, with premium products reaching $120 per gallon. Covering 200 square feet typically requires 3–4 gallons plus primer, totaling $200–$500 in materials. Adding magnetic primer increases material costs by $100–$150. Installation labor varies with wall preparation requirements but generally runs $300–$600 for a professional application, bringing total installed costs to $500–$1,100 for a 200-square-foot surface.
Full-wall whiteboard panels range from $8–$15 per square foot for melamine options to $18–$35 per square foot for porcelain-on-steel systems. A 200-square-foot installation using quality porcelain panels costs $3,600–$7,000 in materials. Professional installation adds $800–$1,500, depending on wall condition and mounting complexity. Total installed cost: $4,400–$8,500 for the same 200-square-foot space—roughly 4–8 times the initial investment required for paint.
This substantial upfront difference drives many budget-conscious decisions toward paint, particularly in temporary spaces or low-use applications. However, the cost equation shifts dramatically when maintenance and longevity enter the calculation.
Long-Term Value and Replacement Costs
Porcelain-on-steel panels typically carry 20–50 year warranties and often remain functional for decades beyond their warranty period. On average, properly maintained porcelain surfaces require no replacement or refurbishment across 30+ years of institutional use. Amortized over 25 years, a $6,000 panel installation costs $240 annually.
Whiteboard paint requires reapplication every 2–5 years depending on usage intensity. Each reapplication involves surface preparation, multiple coats, drying time, and labor—typically costing 60–80% of the original installation. Over 25 years, a painted surface may require 5–8 complete refinishing cycles. The initial $800 investment becomes $4,800–$7,200 in total lifecycle costs, approaching or exceeding the cost of panels while delivering inferior performance throughout.
Maintenance costs amplify this gap. Painted surfaces require specialized cleaning products and more frequent attention to prevent permanent staining. As ghosting accumulates, organizations face the choice of accepting degraded visual quality or accelerating the replacement cycle. Panels need only standard whiteboard cleaner and occasional deep cleaning with isopropyl alcohol, with no performance degradation between cleanings.
Hidden Costs and Productivity Impact
Surface failure creates costs beyond replacement materials. When a whiteboard becomes difficult to erase or shows permanent ghosting, teams lose functional workspace. Meeting efficiency drops when participants struggle to read previous notes or hesitate to write on compromised surfaces. Painted surfaces in high-use environments often become "write-only" within 12–18 months—usable for temporary notes but unsuitable for multi-day project tracking or visual management systems.
Panels maintain consistent functionality throughout their lifespan, supporting the visual management and collaborative workflows that organizations implement them for. This reliability has quantifiable value in educational and business environments where whiteboard surfaces serve as critical collaboration infrastructure rather than occasional-use amenities.
Installation Requirements
Installation complexity and timeframe differ substantially between panels and paint, affecting both direct costs and operational disruption during implementation.
Whiteboard Paint Application Process
Applying whiteboard paint requires thorough surface preparation for optimal results. Walls must be clean, smooth, and free of texture—any imperfection telegraphs through the coating and affects writing quality. Most installations follow this sequence:
Surface preparation (4–8 hours): Fill holes, sand rough spots, and apply primer designed for whiteboard topcoats.
Base coat application (2–3 hours): Apply the first coat of whiteboard paint using foam rollers to minimize texture.
Drying period (12–24 hours): Allow complete curing before additional coats.
Second coat application (2–3 hours): Apply perpendicularly to the first coat for uniform coverage.
Final curing (3–7 days): Wait for complete chemical cure before first use.
Total timeline spans 5–10 days from start to usability. The space must remain vacant and well-ventilated throughout, and many formulations emit noticeable odors during curing. Achieving professional results requires painting experience—DIY applications often show streaks, inconsistent thickness, or premature failure due to inadequate surface prep.
Panel Installation Process
Panel systems mount to walls using concealed hardware that distributes weight across studs or blocking. Professional installation of a 200-square-foot panel system typically requires 1-3 hours:
Wall assessment and blocking (1 hour if needed): Verify stud locations or install horizontal blocking for mounting points.
Hardware installation (1 hour): Mount concealed rails or brackets at precise heights.
Panel hanging (1 hour): Position and secure panels to mounting hardware.
Alignment and finishing (1 hour): Adjust panels for consistent gaps and install trim if specified.
Panels are immediately usable after installation with no curing period. The process generates minimal dust or odor, and adjacent spaces remain functional throughout installation. While professional installation is strongly recommended for large systems, smaller panel installations are feasible for experienced DIYers using manufacturer-provided mounting systems.
Magnatag's WhiteWall systems feature proprietary mounting hardware designed for single-person installation of panels up to 4×10 feet, reducing labor costs while ensuring secure, level mounting. The magnetic backing allows immediate testing and adjustment during installation without tools.
Wall Condition Requirements
Paint demands near-perfect wall surfaces. Texture, joint compound ridges, or surface irregularities create unusable spots on the finished whiteboard. Preparing damaged or textured walls for paint often requires skim coating entire surfaces—a skilled, time-intensive process that can double installation costs.
Panels tolerate moderate wall imperfections since they don't rely on direct surface contact for performance. Mounting systems bridge minor irregularities, and the panel's rigid structure creates a flat writing surface regardless of underlying wall condition. Severely damaged walls may still require repair, but standards are far less stringent than paint demands.
Maintenance and Cleaning
Daily maintenance requirements and long-term care differ substantially, affecting both janitorial labor costs and surface longevity.
Routine Cleaning Protocols
Porcelain-on-steel panels clean easily with standard dry-erase erasers for daily use and damp microfiber cloths for weekly maintenance. Stubborn marks respond to isopropyl alcohol or commercial whiteboard cleaners. The nonporous surface prevents ink penetration, so even markers left on the surface for days or weeks erase completely with minimal effort. Monthly deep cleaning with dedicated whiteboard cleaning solutions maintains optimal performance indefinitely.
Painted surfaces require gentler care to preserve the coating. Aggressive scrubbing accelerates surface wear and opens pores that trap ink. Most manufacturers recommend specific cleaning products and techniques:
Use only soft cloths or foam erasers.
Avoid abrasive cleaners or melamine foam erasers.
Clean frequently to prevent ink from settling into surface pores.
Apply cleaning solution rather than scrubbing dry.
Stain Removal and Surface Recovery
Permanent marker, ink, or other contaminants remove completely from porcelain panels using isopropyl alcohol or acetone-based solvents. The impervious surface prevents penetration, allowing full recovery even from severe marking incidents. Physical damage like scratches or dents is extremely rare due to the hardened glass-ceramic surface.
Painted surfaces offer limited recovery options. Once ink penetrates the porous coating, it becomes permanent. Some users report temporary improvement by applying fresh paint over ghosted areas, but this creates texture differences and typically provides only short-term relief. Permanent marker or other solvents often damage the paint coating itself, requiring complete surface refinishing.
Cleaning Cost Over Time
The cumulative cost of maintenance supplies and labor favors panels significantly. A facility maintaining 500 square feet of whiteboard surface spends approximately:
Painted surfaces:
Specialized cleaning products: $150–$200 annually.
Additional janitorial time for careful cleaning: 2–3 hours weekly ($3,000–$4,500 annually at $30/hour loaded labor cost).
Periodic deep cleaning attempts: $200–$300 annually.
Panel surfaces:
Standard cleaning supplies: $50–$75 annually.
Routine cleaning time: 30 minutes weekly ($600 annually).
Periodic deep cleaning: $100 annually.
Over 10 years, the painted surface costs an additional $20,000–$30,000 in maintenance labor and supplies while delivering progressively degraded performance. These figures exclude replacement costs, which further widen the gap.
Environmental and Health Considerations
Sustainability and indoor air quality increasingly influence facility decisions, particularly in educational and healthcare environments.
VOC Emissions and Indoor Air Quality
Most whiteboard paints contain volatile organic compounds that off-gas during application and curing. While low-VOC formulations have improved, even premium whiteboard paints emit detectable odors for 3–7 days after application, requiring ventilation and potentially triggering sensitivities in occupants with asthma or chemical sensitivities.
Porcelain-on-steel panels are inert, non-toxic, and emit no VOCs during or after installation. The manufacturing process fuses glass to steel at high temperatures, creating a stable material with no ongoing emissions. This makes panels suitable for immediate installation in occupied spaces, including healthcare facilities, schools, and offices with continuous operations.
Lifecycle Environmental Impact
Panel manufacturing is energy-intensive due to high-temperature firing processes, but the resulting product lasts 30–50 years with no material replacement. At end-of-life, steel and glass components are fully recyclable. The extended lifespan means a single panel installation replaces 10–15 paint reapplication cycles, dramatically reducing cumulative material consumption and waste.
Whiteboard paint requires petroleum-based polymers and solvents, with each reapplication adding to cumulative environmental impact. Failed coatings contribute to landfill waste, and the frequent replacement cycle multiplies embodied energy and emissions across the product's functional lifespan.
Organizations pursuing LEED certification or sustainability goals typically favor durable, long-lived materials over products requiring frequent replacement, making panels the more environmentally responsible choice despite higher embodied energy in manufacturing.
Use Case Recommendations
The optimal choice depends on specific application requirements, usage intensity, and budget constraints.
When Whiteboard Paint Makes Sense
Paint suits temporary installations, creative applications, and low-intensity use cases:
Residential applications like home offices or children's rooms with light, intermittent use.
Creative or irregular surfaces such as columns, curved walls, or artistic installations where seamless coverage matters more than performance.
Budget-constrained projects where upfront cost is the primary decision factor and performance degradation is acceptable.
Experimental or pilot installations testing whiteboard functionality before committing to permanent solutions.
When Panels Deliver Superior Value
Full-wall whiteboard panels justify their premium in professional, educational, and high-use environments:
Corporate collaboration spaces with daily intensive use requiring reliable, long-term performance.
Educational institutions where durability, consistent performance, and magnetic capability support teaching methods.
Healthcare facilities needing hygienic, easy-to-clean surfaces with no VOC emissions.
Visual management systems where magnetic capability enables structured layouts with cards, indicators, and printed templates.
Permanent installations where lifecycle cost matters more than initial investment.
High-visibility applications where surface degradation would reflect poorly on the organization.
Magnatag's WhiteWall systems excel particularly in structured visual management applications, offering custom-printed templates that combine writable space with fixed organizational frameworks—functionality impossible to replicate with paint.
Frequently Asked Questions
Can you make whiteboard paint magnetic?
Magnetic primer can be applied beneath whiteboard paint, but it provides weaker magnetic hold compared to steel-backed panels and adds installation complexity and cost.
How long does whiteboard paint actually last?
Quality whiteboard paint maintains acceptable performance for 2–5 years in moderate-use environments, but high-traffic installations often show ghosting within 12–18 months.
Do whiteboard panels require professional installation?
While experienced DIYers can install smaller panel systems, professional installation ensures proper alignment, secure mounting, and optimal appearance for large or complex installations.
What causes ghosting on whiteboard surfaces?
Ghosting occurs when marker ink penetrates porous surfaces and cannot be fully removed; porcelain panels resist ghosting due to their nonporous glass-ceramic surface, while painted surfaces become increasingly prone to ghosting as the coating wears.
Can damaged whiteboard paint be repaired?
Minor ghosting or wear requires complete surface repainting; spot repairs create visible texture differences and rarely restore performance.
Are whiteboard panels suitable for curved walls?
Standard rigid panels require flat surfaces; whiteboard paint better accommodates curved or irregular walls where seamless coverage is needed
The Definitive Guide to Creating High‑Quality Branded Whiteboards with Magnatag
Fri Nov 21 2025Custom branded whiteboards transform ordinary wall space into powerful tools for visual communication and brand reinforcement. Organizations investing in branded whiteboards gain more than a writing surface—they create a personalized writing surface that displays company identity while enhancing collaboration, workflow management, and strategic planning. Instead of forcing your team’s unique processes into a rigid, off-the-shelf template, a custom whiteboard is designed around the way you actually think, plan, and work. This guide walks you through every step of creating a high-quality branded whiteboard with Magnatag, from assessing your needs and selecting materials to customization, installation, and long-term maintenance. Whether you're outfitting a conference room, production floor, or collaborative workspace, you'll learn how to design a solution that aligns with your operational requirements and elevates your brand presence in every meeting and planning session.
Understanding the Benefits of Branded Whiteboards
Organizations that invest in branded whiteboards discover they serve dual purposes: reinforcing company identity while functioning as high-impact visual communication tools. A branded whiteboard is a dry-erase display customized with company logos, colors, or workflow templates to bolster brand consistency and operational efficiency. Unlike generic whiteboards, these customized solutions integrate seamlessly into your organization's visual language, making every planning session, team standup, and client presentation an opportunity to showcase professionalism.
The collaboration benefits are substantial. Branded whiteboards provide a shared platform for visualizing tasks and idea exchange, creating a focal point where teams can gather to brainstorm, track progress, and align on priorities. When everyone can see the same information simultaneously, communication barriers fall and decision-making accelerates.
Workflow alignment represents another significant advantage. Custom layouts can integrate calendars, grids, or process templates tailored specifically for your team's operations. Rather than forcing your processes to fit a generic board, design the board to fit your processes. A manufacturing team might need production tracking columns, while a marketing department benefits from campaign timelines and milestone markers. This customization eliminates the friction of adapting standard tools to specialized needs.
Beyond functionality, branded whiteboards reinforce your organization's identity in strategic meetings, presentations, and day-to-day activities. When clients, partners, or new employees enter your workspace, the consistent branding signals attention to detail and organizational coherence. Your whiteboard becomes part of your physical brand ecosystem, contributing to the professional atmosphere you've worked to cultivate.
Assessing Your Organization's Visual Communication Needs
Before selecting or designing a custom whiteboard, conduct a thorough evaluation of how your teams currently use visual aids. This assessment prevents mismatches between what you purchase and what you actually need. Start by observing current whiteboard or visual tool usage patterns and identifying pain points. Walk through your workspace and note where people naturally gather to share information, which boards see the most activity, and where communication bottlenecks occur.
Document specific requirements that emerge from this observation. Do teams frequently sketch process flows? Track project timelines? Maintain running task lists? Each use case suggests different design elements. Consider creating a requirements checklist that includes:
Team size and typical meeting attendance
Frequency of board usage (daily stand-ups vs. weekly planning)
Types of information regularly visualized (schedules, project trackers, process maps)
Cleaning and supply needs based on usage intensity
Mobility requirements (wall-mounted vs. portable)
Pay particular attention to workflow patterns. If your team runs Agile sprints, you'll need space for backlog items, in-progress tasks, and completed work. If you're tracking production metrics, columns for different shifts or product lines become essential. The goal is to match your whiteboard's layout to the actual information your team needs to see and update regularly.
This assessment phase also reveals whether you need one large comprehensive board or multiple specialized boards for different functions. Some organizations benefit from a main planning board supplemented by smaller tactical boards near workstations. Others need a single high-visibility board that serves as the team's central information hub. If you've made your way through the entire assessment process and still don't know what you need, start with the essentials. It is always easier to scale up a custom board initiative than it is to scale one back after you've overbuilt it. Begin with a focused set of core elements, and see what works. Starting small ensures that every addition is driven by genuine need rather than assumption, leading to a more effective, adaptable visual management system in the long run.
Selecting the Right Size and Style for Your Workspace
Choosing the appropriate whiteboard dimensions and design options requires careful consideration of your physical space and how people will interact with the board. Start by measuring available wall space, but don't stop there—consider both standing and seated lines of sight. A board positioned too high frustrates seated participants, while one mounted too low gets obscured by standing team members.
We recommend mounting your whiteboard so the top edge sits 6 to 7 feet from the floor, creating optimal visibility for most users. To be more specific, the top of a 4 x 6’ whiteboard should hang 84” off the floor; a 3 x 4’ board should be 78”, and a 2 x 3’ should hang no higher than 72”. This height allows comfortable viewing and writing for people of varying heights while maintaining accessibility. ADA recommendations specify mounting heights and locations to allow access for all users, including those with disabilities, ensuring your visual communication tools serve everyone on your team.
Beyond height, evaluate the various styles available to match your workspace dynamics. Frameless edge-to-edge boards create a sleek, modern aesthetic and maximize usable surface area. Mobile boards on casters offer flexibility for teams that frequently reconfigure their spaces or need to move planning sessions between rooms. Double-sided panels provide twice the surface area in the same footprint, ideal for teams managing multiple projects simultaneously.
Consider how your workspace might evolve. A board that works perfectly today should still serve you as teams grow or processes change. Modular systems that allow future expansion often prove more cost-effective than replacing an undersized board later.
Customizing Your Whiteboard with Magnatag
Magnatag's customization process relies on the expertise of our in-house design team and custom whiteboard system specialists, who have assisted thousands of customers in bringing their visions to life.
You can either start with one of our field-proven template options, spanning a wide range of organizational needs, and customize it with your choice of personalized headers and titles. Or you can explore completely custom layouts, providing you with total control over the design, fonts, images, and scale.
Integrating Brand and Layout Elements
If you opt for the custom route, key considerations you’ll want to keep in mind include brand-aligned fonts and colors, and layout elements such as column headings, row labels, and workflow templates. To ensure crisp, high-quality results when integrating your company logo, please provide it in a vector format (such as .EPS, .AI, or .SVG) or as a high-resolution raster file. If you are using a raster file (PNG, JPG, etc.), it must be supplied at 300 DPI and sized to the exact dimensions you want it to appear on the finished board (for example, a 12" x 12" logo needs to be 3600 x 3600 pixels at 300 DPI). For organizations with specific branding guidelines, our printing process accommodates precise color matching and logo placement requirements, allowing you to position your logo prominently for client-facing boards or subtly in a corner for internal planning tools.
Optimizing for Readability and Distance
A core focus of effective design is visual hierarchy. This means calibrating all elements: the line weights, the size of the lettering, row heights, and spacing, to ensure the board is easy to read, easy to understand, and easy to update. If the board is hard to read, it isn’t going to work. Typography choices range from professional corporate fonts to more casual styles, depending on your workplace culture and communication preferences. One key recommendation on the fonts front is simple: don’t be afraid to make your text large. We use precise ratios to ensure your board is readable from the necessary distance. Whether you are in a small patient room or a massive warehouse floor, we scale the font and row heights to match the specific viewing requirements.
Choosing Durable Materials and Superior Printing Technology
Material quality separates temporary solutions from long-term investments. Most manufacturers offer a variety of writing surfaces to choose from. When evaluating which surface to choose from, you’ll want to evaluate the surface for four notable qualities: durability, magnetic properties, any associated maintenance costs, and ideal use-cases. The table below provides a quick comparison chart for four of the most common writing surfaces used in the custom whiteboard industry.
The printing technology deserves equal attention. Magnatag's proprietary process bonds custom graphics, text, and layout elements directly to the board surface at a molecular level. This differs fundamentally from vinyl overlays or screen-printed surfaces that sit on top of the writing area. The result is graphics that never peel, fade, or interfere with writing and erasing. Vinyl and laminates are a different story; once the overlay begins to degrade, its failure accelerates. Edges lift, air pockets form, and the surface becomes increasingly prone to staining and ghosting. Eventually, the writing area loses its smoothness, forcing users to press harder with markers and making erasing inconsistent. As the laminate continues to separate from the substrate, the board not only looks worn but also becomes functionally unreliable. For this reason, laminates and melamine custom boards should only be used for short-term solutions.
Planning and Executing Easy Whiteboard Installation
Magnatag designs its installation process for simplicity, operating on the principle that if you can hang a picture, you can hang a Magnatag board. Each whiteboard arrives with all necessary mounting hardware and clear, step-by-step instructions that guide you through the process without requiring specialized tools or professional assistance.
The typical installation sequence follows these steps:
Identify the mounting location and mark the desired height
Locate wall studs using a stud finder for secure attachment
Attach the mounting brackets to the wall, ensuring level placement
Hang the whiteboard on the installed brackets
Verify level positioning and make minor adjustments if needed
Tighten all connections for secure, permanent mounting
For organizations without maintenance staff, the process remains straightforward. The included hardware typically consists of brackets, screws, and anchors appropriate for standard drywall or concrete walls. The brackets are designed for easy alignment, with built-in leveling features that prevent the frustration of crooked installations.
Accessibility and safety considerations should guide your installation planning. Ensure boards are easily reachable for all team members, including those using wheelchairs or other mobility devices. Avoid placing boards where glare from windows or overhead lights will reduce visibility. Consider the traffic flow in the room—boards should be visible from primary seating areas without requiring people to crane their necks or obstruct pathways.
For larger boards or modular systems, you may want to enlist a colleague's help during the hanging process. While the hardware does the heavy lifting, an extra set of hands makes alignment easier and prevents accidental drops. Most installations take 30 minutes or less once you've identified the location and gathered basic tools.
Training Teams to Maximize Whiteboard Usage and Collaboration
A new branded whiteboard represents an investment in communication infrastructure, but its value depends entirely on adoption. Organize training sessions to introduce board features and encourage experimentation with different organizational approaches. These sessions don't need to be formal or lengthy—a 15-minute team gathering can effectively demonstrate the board's layout, explain the purpose of different sections, and invite questions.
During training, walk through the custom elements you've designed. If you've created columns for different project phases, explain the workflow they represent. If you've included a section for parking lot items or action items, clarify how the team should use those spaces. The goal is to establish shared understanding about what information goes where and who's responsible for updating different sections.
Provide usage guidelines that standardize communication and make workflows visible. Consider establishing conventions such as:
Color coding for different project types or priority levels
Update frequency (daily, weekly, or as-needed)
Ownership of different board sections
Protocols for erasing or archiving completed items
Rules for keeping the board current and relevant
Best practices for ongoing usage include integrating the whiteboard into existing meeting rhythms. Start standups or planning sessions by reviewing what's on the board. End meetings by updating the board with new information or decisions. Make board updates a regular part of team routines rather than an occasional activity.
Encourage team members to experiment with the board's capabilities. Some teams discover that color-coding with different marker colors helps track information flow. Others find that adding temporary magnetic labels creates flexibility for changing priorities. The more teams interact with the board and adapt it to their needs, the more valuable it becomes.
Maintaining Your Branded Whiteboard for Long-Term Performance
Proper maintenance preserves your whiteboard's appearance and functionality for years. The foundation of good maintenance is using high-quality dry-erase markers and cleaning solutions.
Ghosting: the faint, stubborn marks left behind after repeated writing and erasing on a whiteboard surface, represents the most common maintenance challenge. Preventing ghosting is far easier than removing it. The key is never leaving marker ink on the board for extended periods. Erase content promptly, ideally within 24 hours of writing. For information that needs to remain visible longer, consider photographing the board and erasing it, then rewriting when needed. Dry-erase surfaces made of melamine, laminates, and paints are far more likely to exhibit ghosting, and thus, require an added layer of maintenance.
Daily maintenance should include:
Erasing all temporary content with a quality eraser
Quick wipe-down with a dry microfiber cloth to remove eraser residue
Checking marker supply and replacing dried-out markers promptly
Weekly maintenance adds deeper cleaning:
Spray whiteboard cleaner across the entire surface
Wipe clean with a microfiber cloth in circular motions
Dry thoroughly to prevent streaking
Inspect for any stubborn marks requiring extra attention
For persistent marks or ghosting that does occur, use specialized whiteboard cleaning solutions rather than household cleaners. Many general-purpose cleaners contain ingredients that damage dry-erase surfaces or leave residues that interfere with marker performance. Magnatag's dry-erase supplies are formulated specifically for their board surfaces, ensuring compatibility and effectiveness.
Store markers horizontally or tip-down to prevent ink from settling away from the tip. Replace markers at the first sign of fading or skipping rather than pressing harder, which damages both the marker and the board surface. Keep a supply of fresh markers readily available—running out of working markers is the fastest way to undermine board usage.
Frequently Asked Questions
What features should I look for in a high-quality branded whiteboard?
Prioritize durable magnetic surfaces, custom layout printing, easy-clean materials, and sturdy framing to ensure reliable daily performance and a professional appearance.
How do I determine the appropriate size and layout for my whiteboard?
Assess your workspace dimensions, team size, and information flow patterns, ensuring clear visibility from all seating positions and comfortable reach for all users.
What customization options are available for adding branding and templates?
Any of Magnatag’s pre-existing templates can be customized with your choice of headers and titles at no additional cost. If you’re in the market for a fully-custom solution, you can link up with our design team to design a whiteboard built from the ground-up
Can I install a Magnatag whiteboard myself, and what is required?
Yes, each board includes all mounting hardware and clear instructions for straightforward installation without professional help.
How do I clean and maintain my whiteboard to prevent ghosting and staining?
Use quality dry-erase markers, erase content within 24 hours, and clean regularly with specialized whiteboard solutions and microfiber cloths.